Setting up a level for dialog and AI scripting
Unreal 2 has dialog and AI scripting systems that are controlled through text files. This tutorial shows you how to prepare a level so that the game knows where it can find those scripts.
Pick a unique title for your level. This is important, because all scripts will go in a directory of the same name, and you don't want to get mixed up with other levels. (For example if you title your map "CoolLevel" and another LD also uses "CoolLevel" the scripts for both levels will be in the same directory, making it confusing to tell them apart). I recommend adding your initials to the end of the name, for example "CoolLevel_mw". Since this is an internal name only (it doesn't have to match the .un2 filename or level-enter text) you can be pretty cryptic.
Create the dialog subdirectory, in this case "CoolLevel_mw": "../Unreal2/Dialog/CoolLevel_mw". All .dlg files that you create for the mission will go in here.
Create the AI scripts subdirectory, in this case "CoolLevel_mw": "../Unreal2/Scripts/CoolLevel_mw". All .u2s files that you create for the mission will go in here. If you don't specify a .u2s directory the game will look in the base "../Unreal2/Scripts" directory, but you want to avoid that.
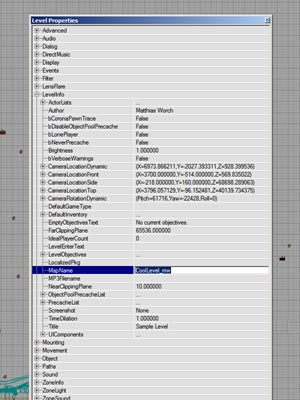
Open your level and set the pathname: open the "Level Properties" (View->Level Properties or F6), open the "Level Properties" tab and enter the same name that you used for the directories in the "MapName" slot.

That's it! Unreal 2 will now match the title specified in "MapName" with the directories on the harddrive. If you have several small levels making up one big mission you can put all scripts for those sublevels in the same directory. If you make a completely new mission you should use a new directory.
Tutorial by Matthias Worch
 RSS Feed